

Triggered Email allows you to send CredSpark interactions directly to participants by email, send automated reminders (nudges), and track who was invited, who started, and who submitted their responses.
This feature is especially useful when you want to invite a specific group of people to complete an interaction, rather than sharing a public link. For example, you might want to:
Send a training assessment to employees and track who has completed it.
Invite customers to participate in a feedback survey.
Collect feedback from attendees after an event.
Send the same interaction to different groups of participants and track their progress separately.
With Triggered Email, you can manage your recipients, customize the emails they receive, schedule automatic reminders, and monitor participation.
You can also create multiple campaigns for the same interaction, each with its own contacts, email messages, and tracking information.
Creating a Campaign
Open the interaction you want to send.
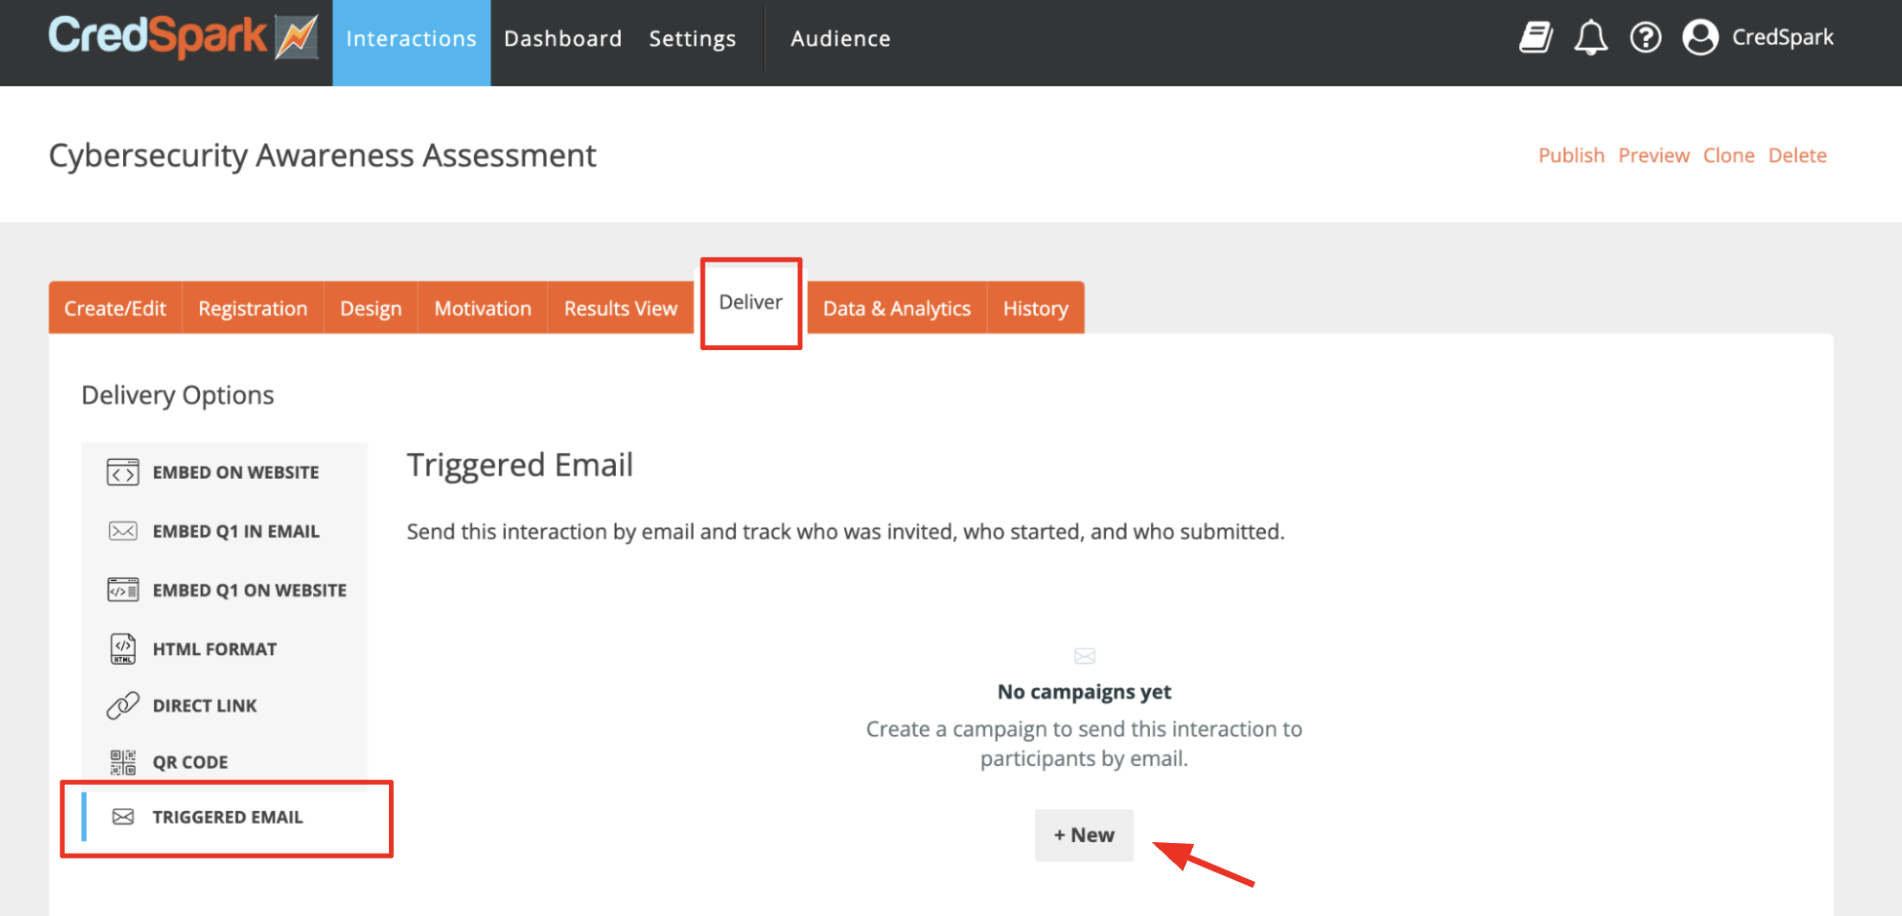
Go to the Deliver tab and select Triggered Email.
Click "New".
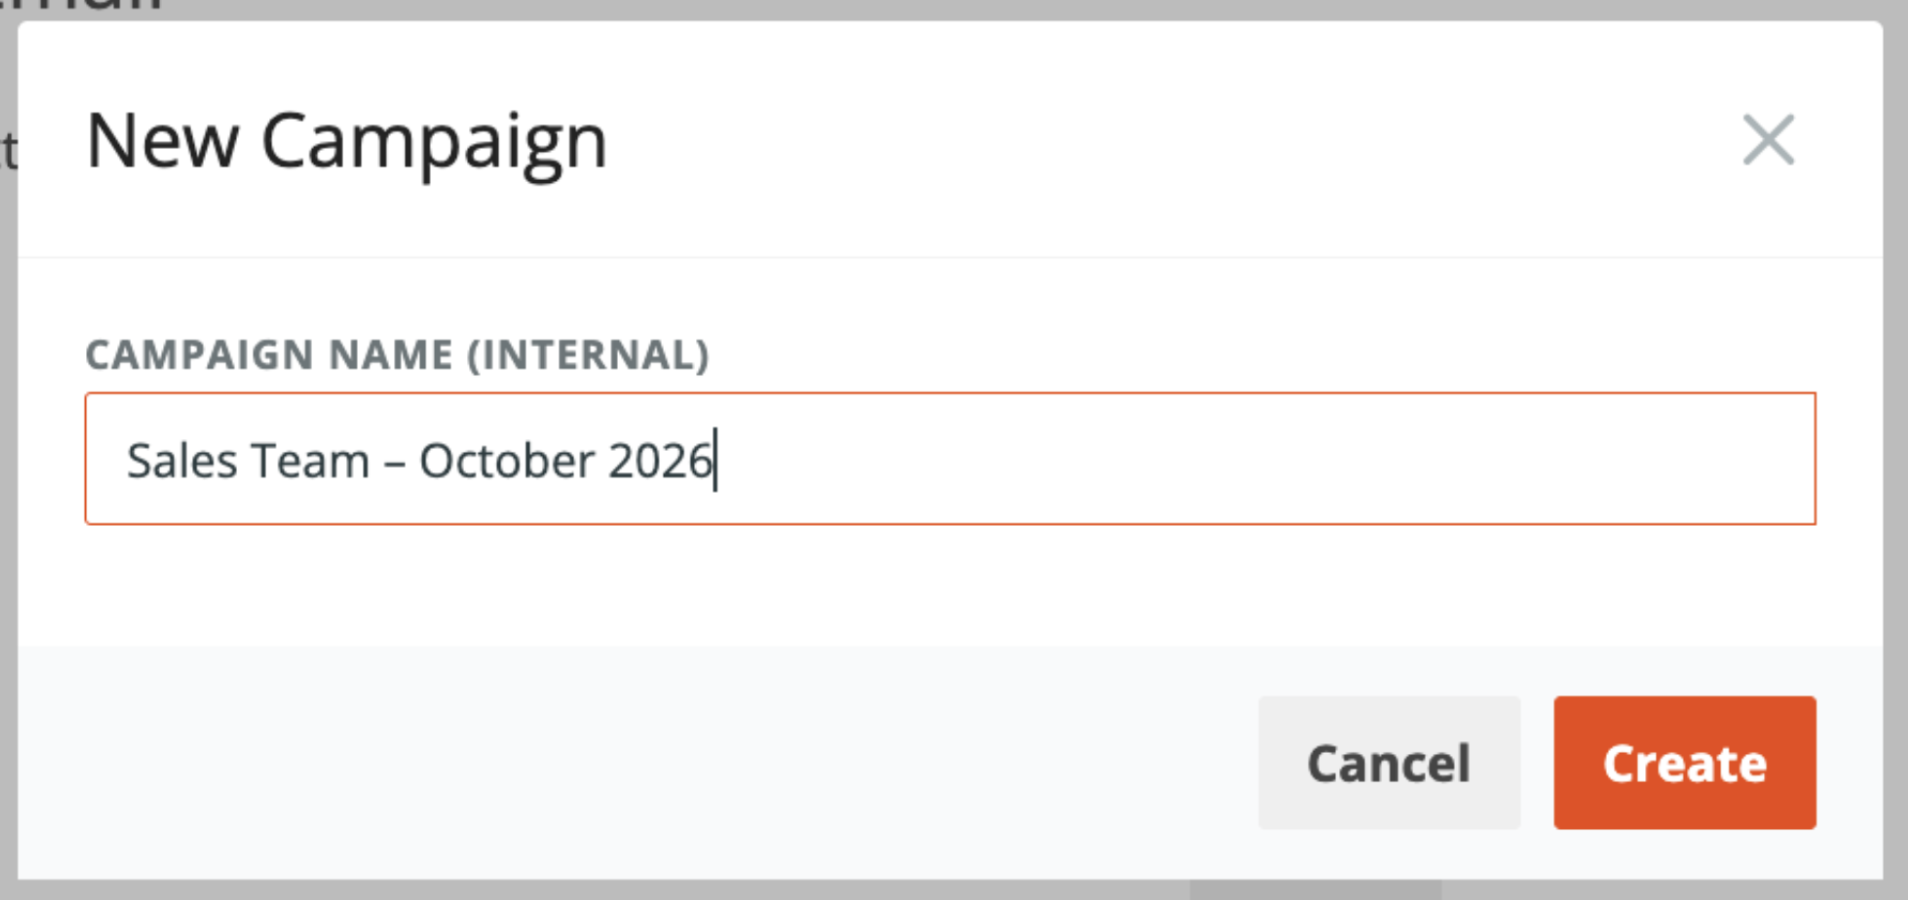
Enter an Internal Campaign Name and click Create.
Once your campaign is created, you will see four tabs: Messages, Contacts, Send, and Tracking.
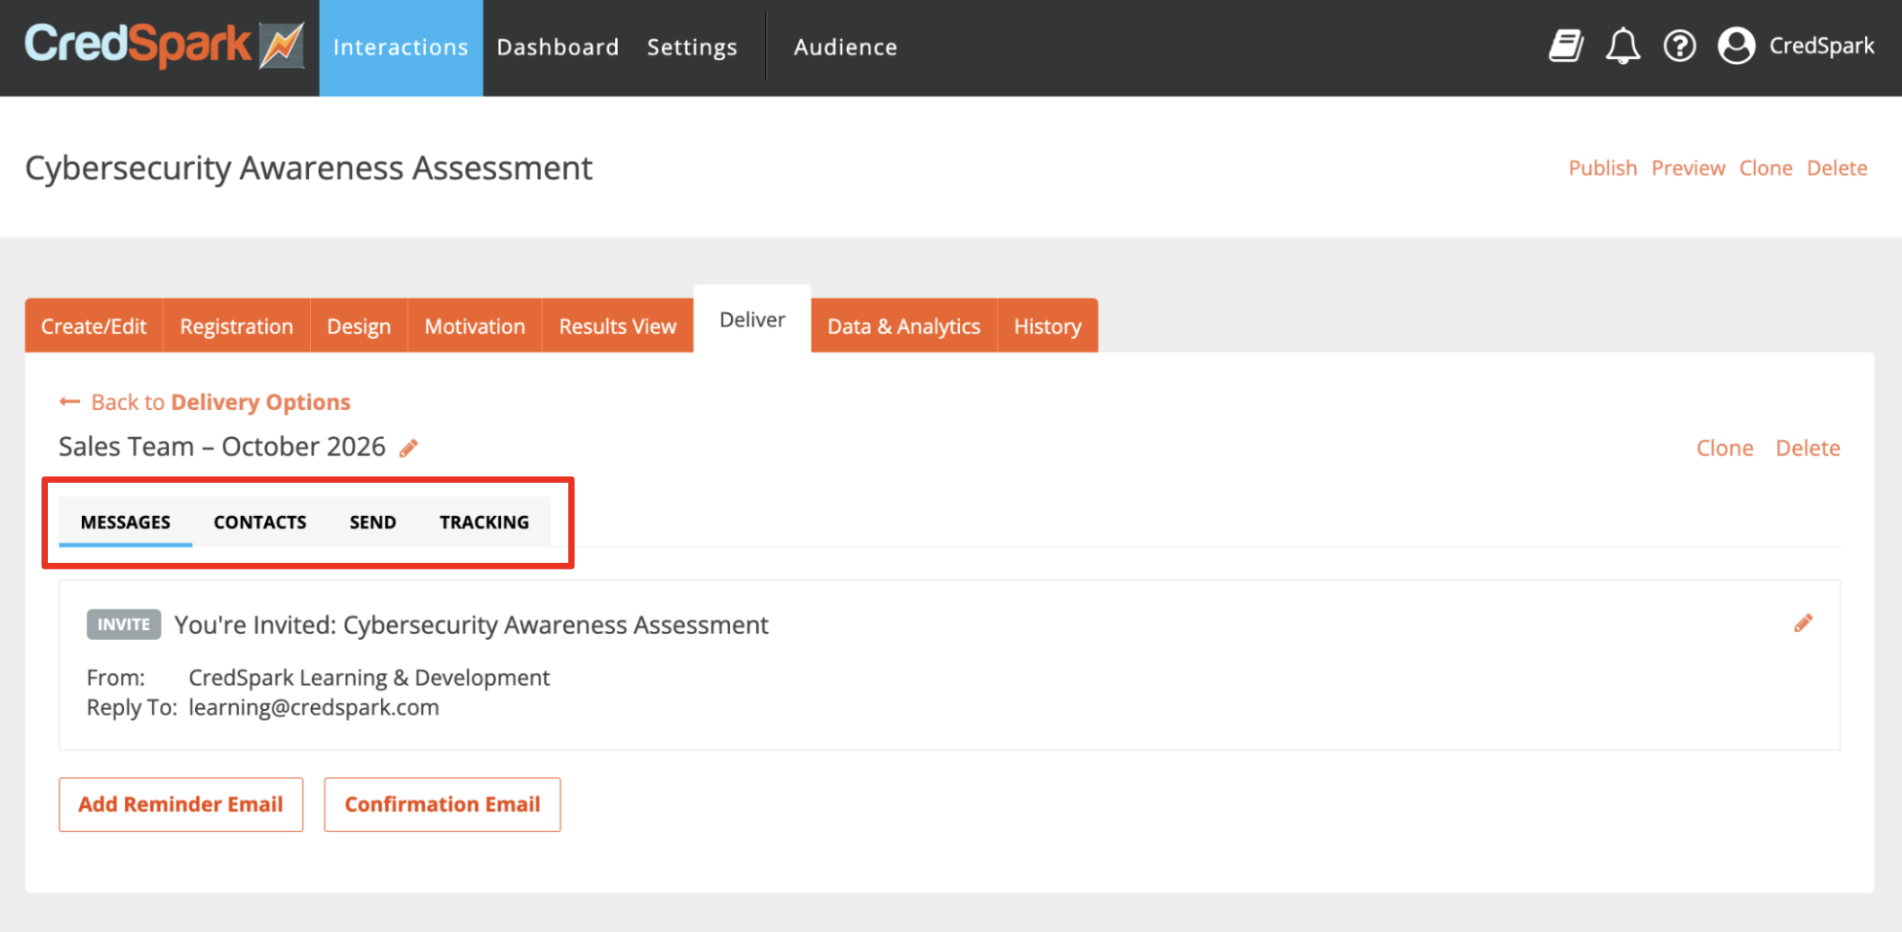
1. Messages
The Messages tab is where you set up the emails participants will receive.
There are three types of email messages: Invitation Email, Reminder Emails, and Confirmation Email.
Invitation Email
The Invitation Email is the initial email sent to participants, inviting them to complete your interaction.
An Invitation Email is automatically included in every new campaign and cannot be removed. However, you can customize the sender name, subject line, and email body.
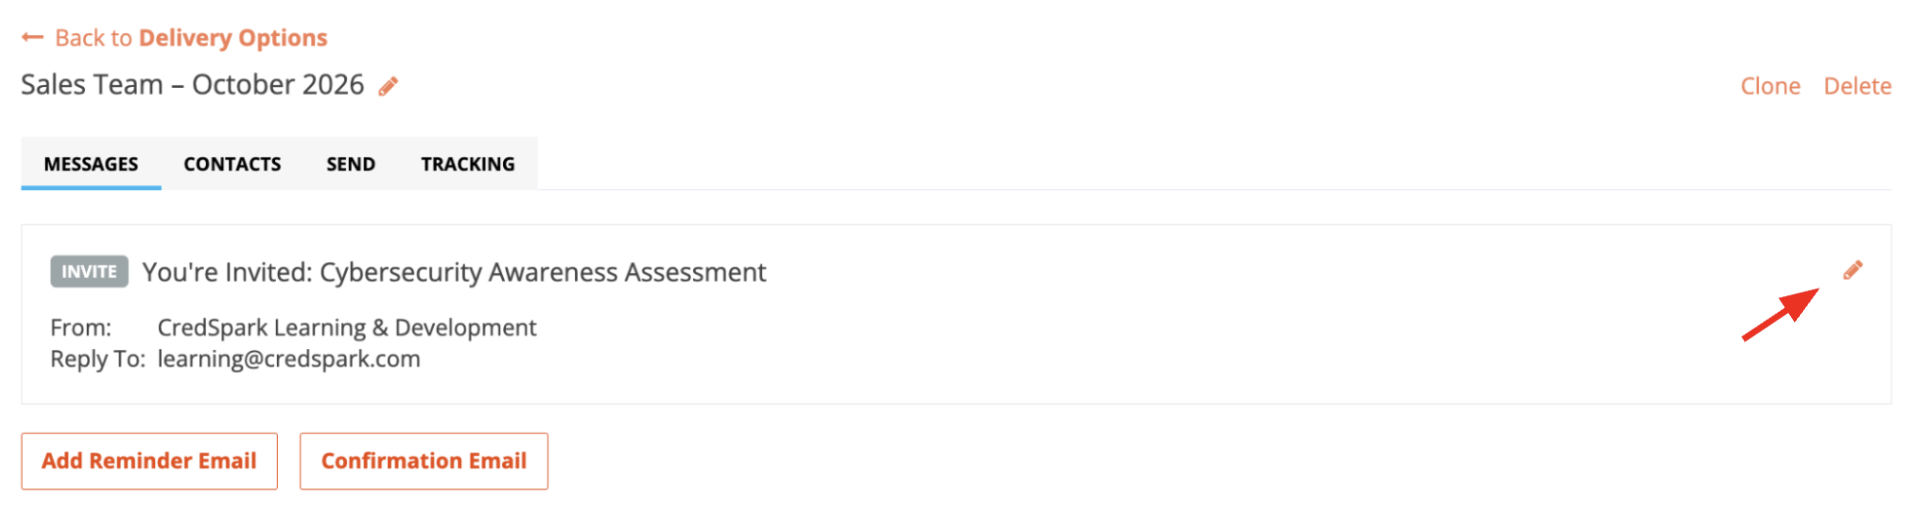
Each participant receives a unique link to the interaction in their Invitation Email. This allows CredSpark to identify individual participants and track their progress, including whether they have started or submitted their responses.
Reminder Emails
Reminder Emails allow you to follow up with participants who have not yet submitted their responses. Reminder Emails are optional.
You can add multiple reminders, each with its own schedule and email content.
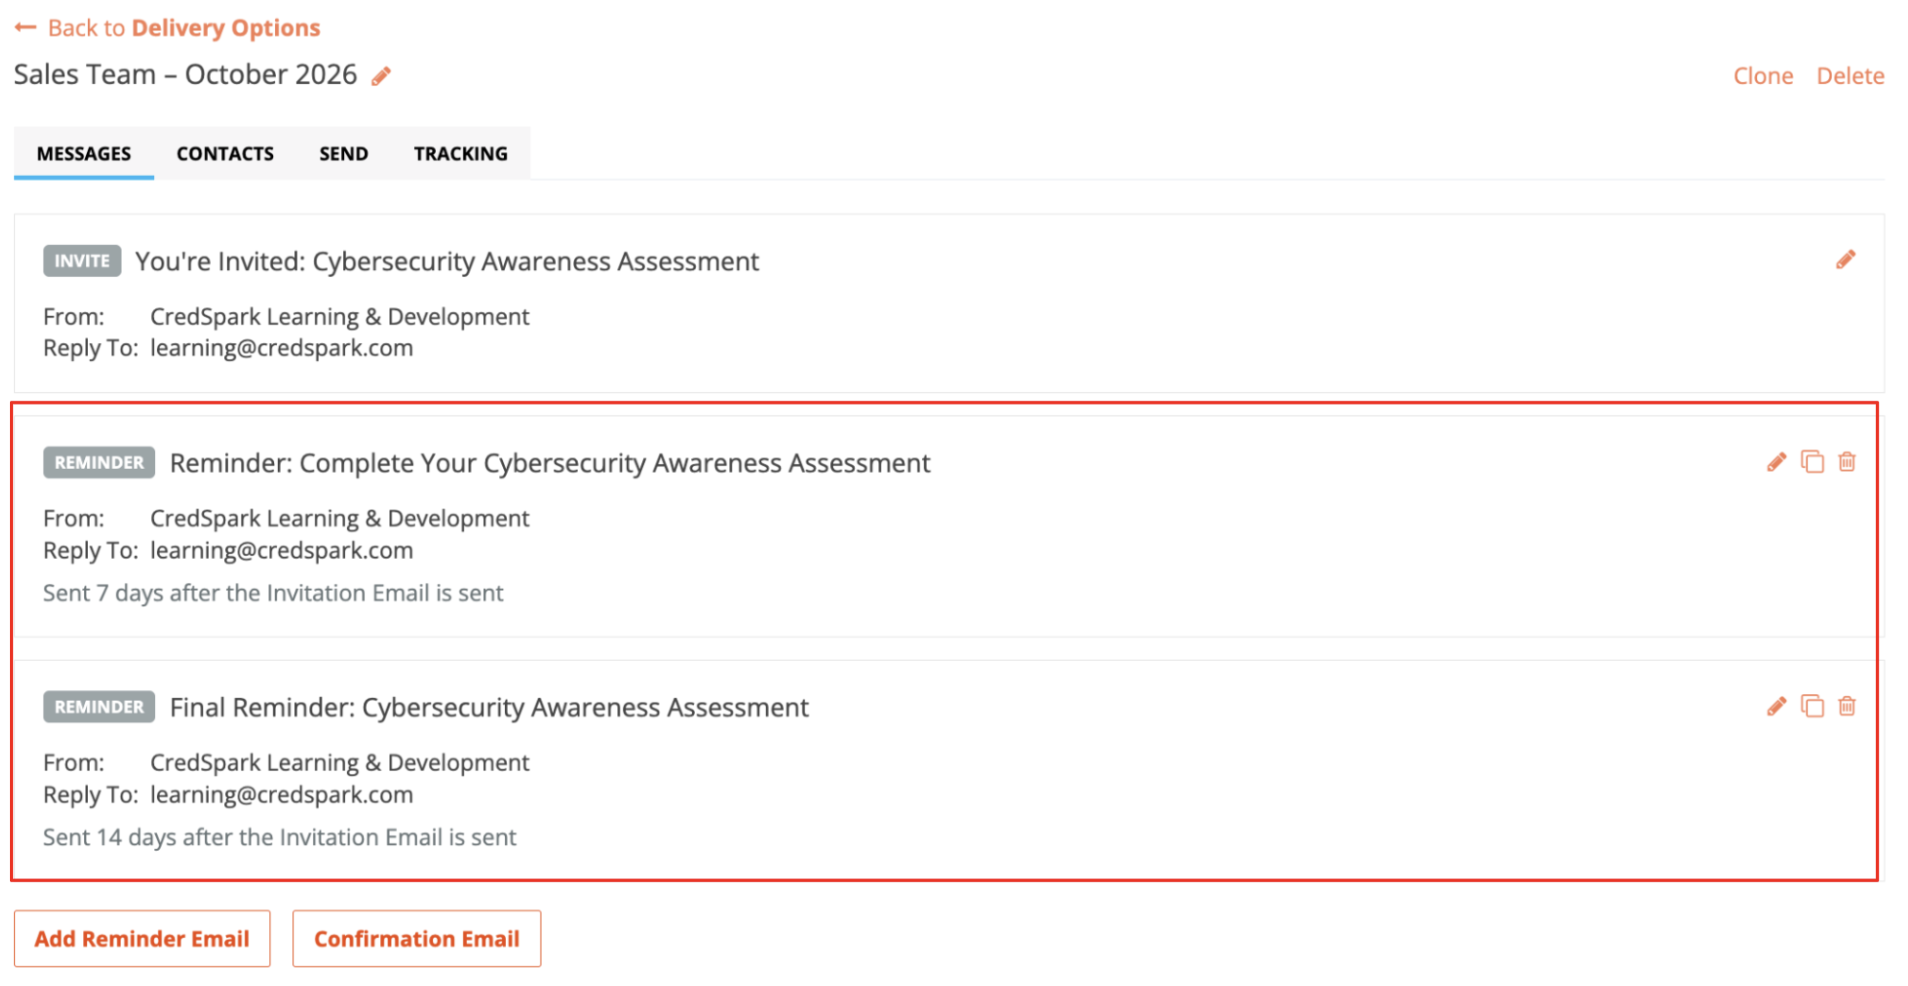
To add a reminder, click Add Reminder and configure the message and its schedule.
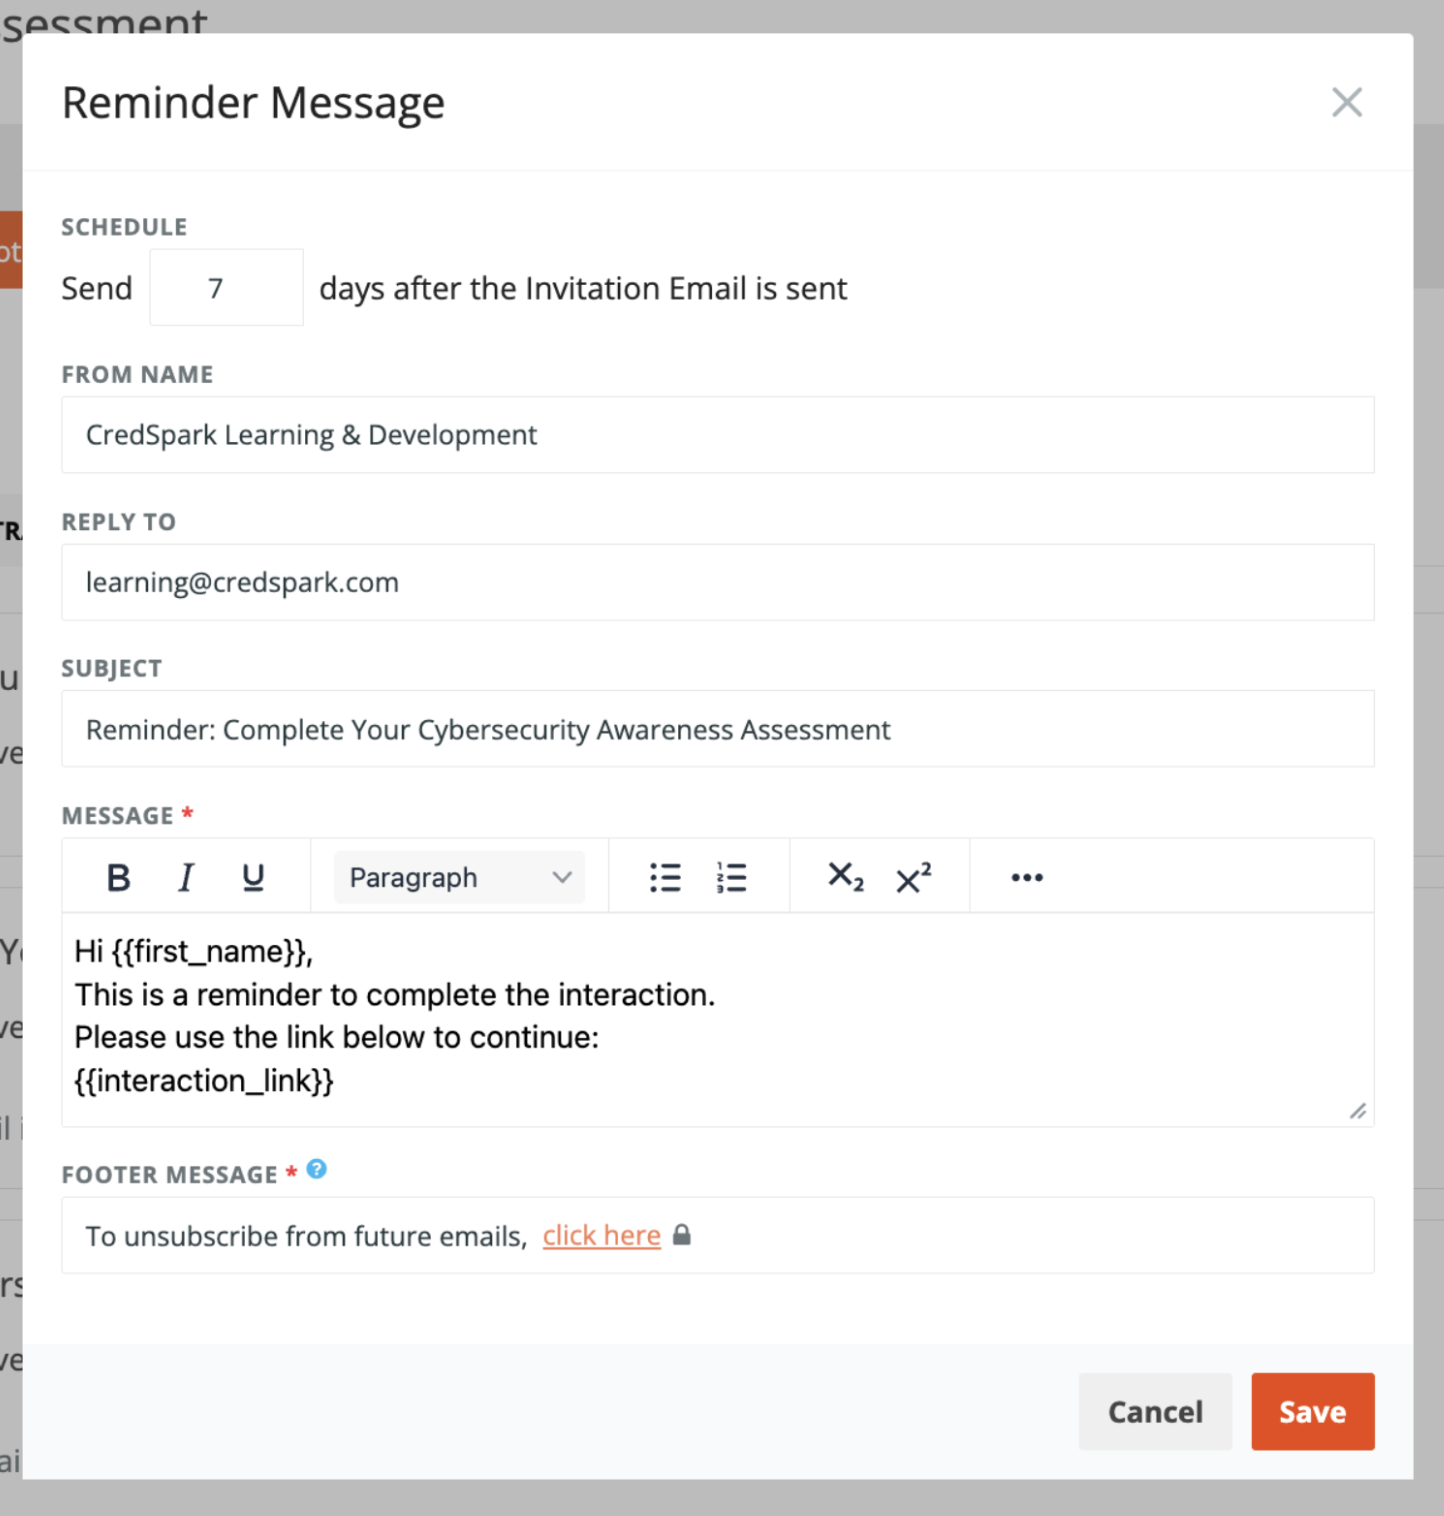
Scheduling Reminders
Reminders are scheduled based on the number of days after the Invitation Email was sent to each participant.
For example:
Reminder 1: 3 days after the Invitation Email
Reminder 2: 7 days after the Invitation Email
Since participants may receive their invitations on different dates, reminder schedules are calculated individually for each participant.
You can configure reminders to target participants who:
Have not started the interaction (Not Started).
Have started but not submitted their responses (Started).
Important: Once a participant submits their response, they will no longer receive reminder emails.
Editing Reminder Schedules
You can edit a reminder's schedule before it starts sending. Once sending has started for a reminder, its schedule can no longer be changed. However, you can still edit the email subject and content, or delete it.
Overdue Reminders
If you add or change a reminder schedule and some participants are already past the scheduled date, CredSpark will ask how you want to handle those participants.
You can choose to:
Send now: Send the reminder immediately to eligible participants who are already overdue.
Skip: Skip this reminder for participants who are already overdue.
The reminder will still be sent according to its schedule to other eligible participants.
Confirmation Email
The Confirmation Email is an optional email that you can add to your campaign. It is automatically sent to participants after they submit their responses.
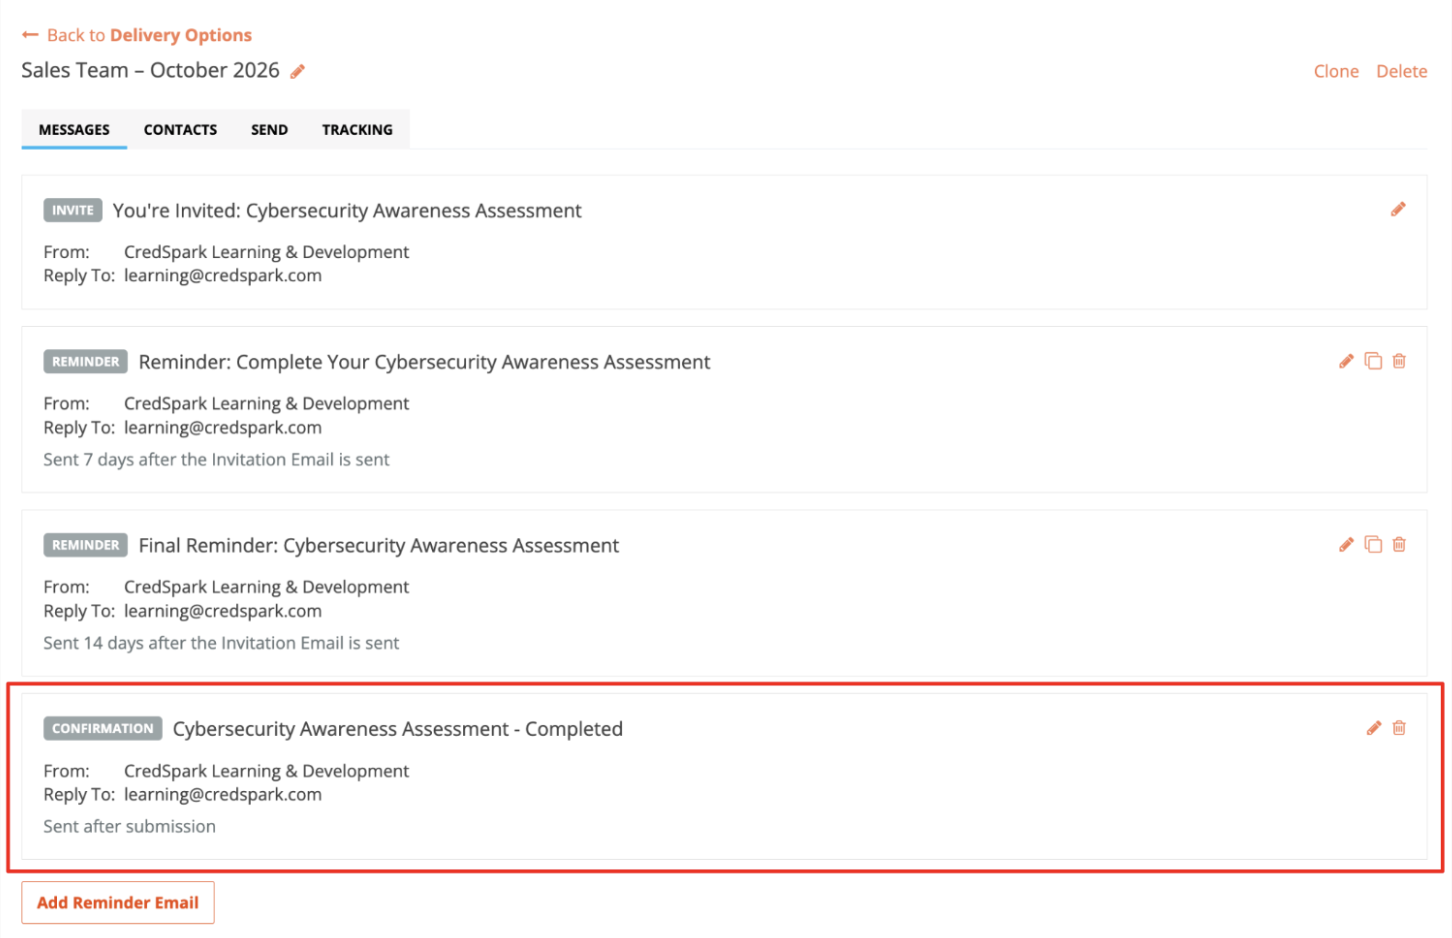
You can customize the sender name, subject line, and email body.
For example, you might use this email to thank participants for completing an assessment or confirm that their response was successfully submitted.
Customizing Email Messages
We recommend reviewing and customizing your email messages before sending your invitations to make sure they fit your interaction and audience.
For each message, you can customize the sender name, subject line, and email content.
You can also personalize your emails using piping. For example, you can:
Include the interaction name in the email subject line.
Address participants by their first or last name.
Include other available participant information in the email content.
Invitation and Reminder Emails include a hyperlink that directs each participant to their interaction.
You can also customize the Footer Message. An unsubscribe link is required and cannot be removed.
Recipients can use this link to unsubscribe from future emails from your organization.
2. Contacts
The Contacts tab allows you to manage the people who will receive emails from your campaign.
To add contacts:
Click Add Contacts
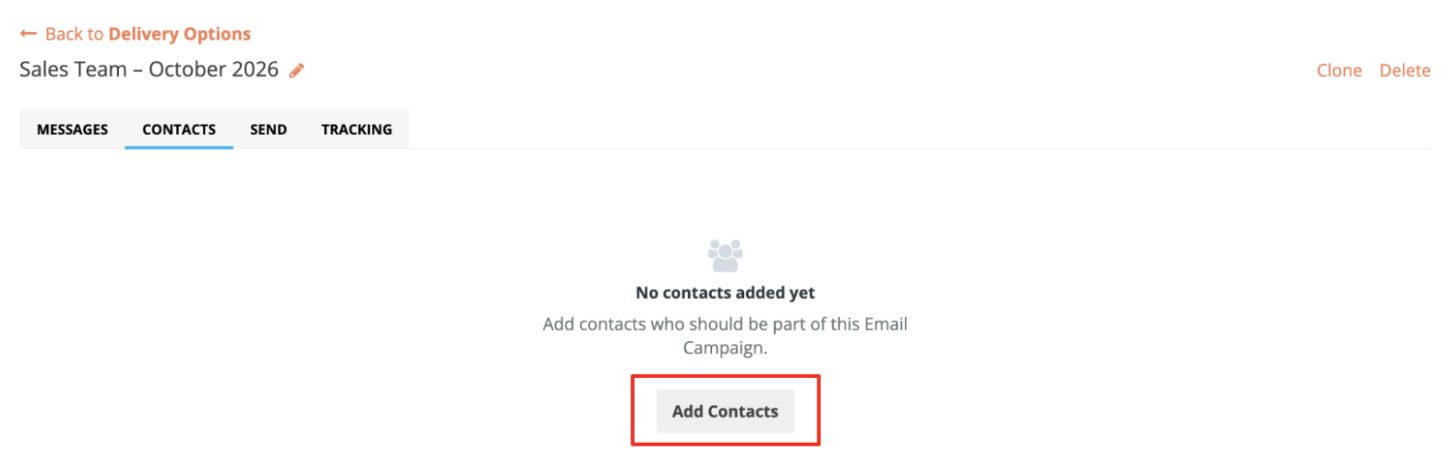
Choose one of the available options:
Import Participants
Add a Contact Manually
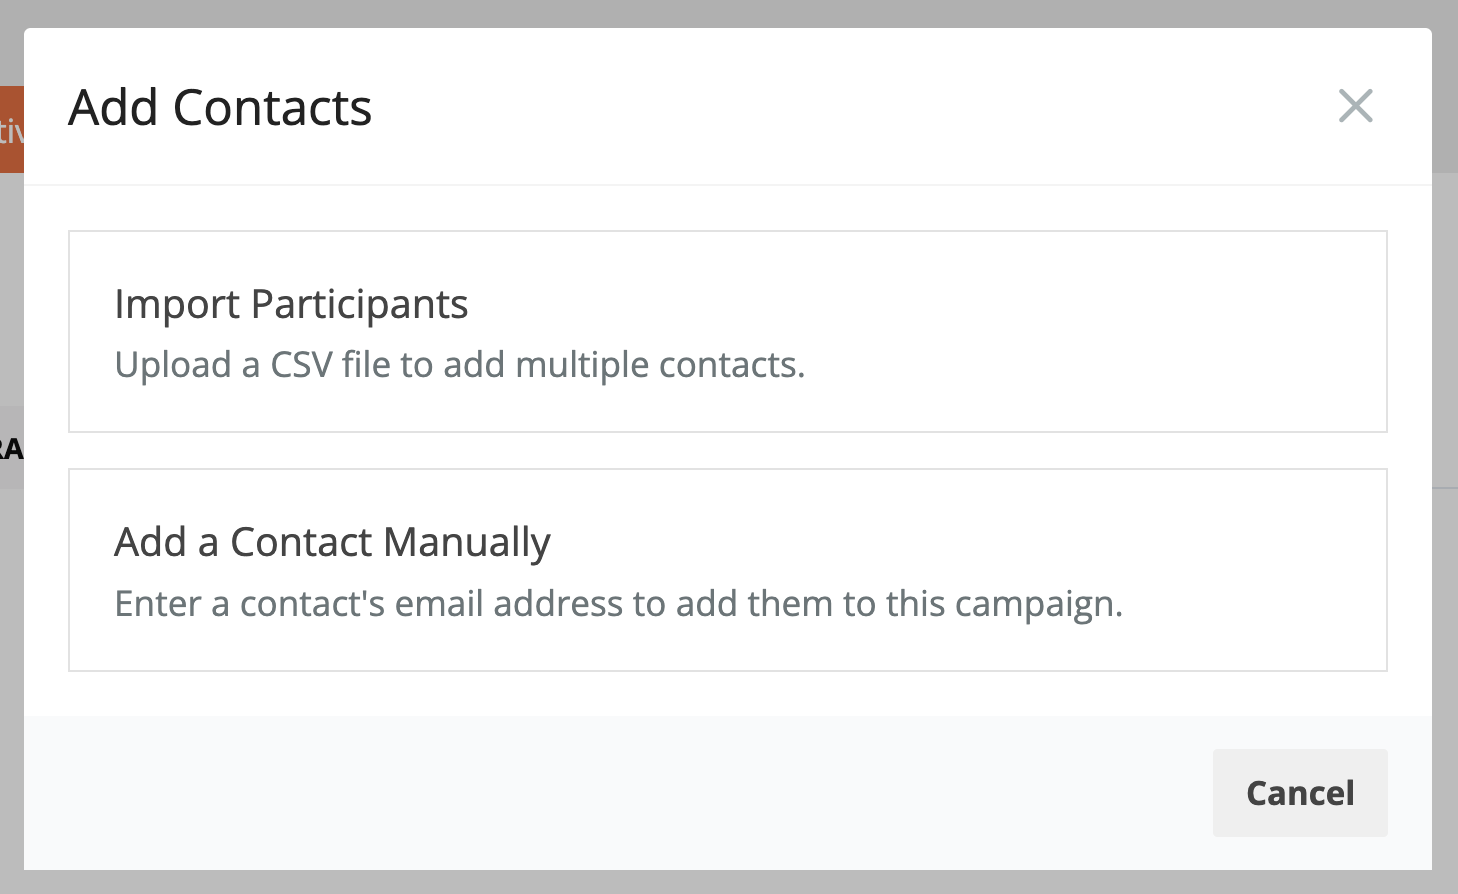
Import Participants
Use this option to add multiple contacts at once.
Select Upload a Spreadsheet.
Download the provided CSV template.
Add your contacts to the CSV file.
Upload the file to add the contacts to your campaign.
An email address is required for every contact. You can also include additional information, such as first name and last name.
Make sure your CSV file follows the provided template.
Add a Contact Manually
Use this option to add individual contacts to your campaign.
Select Add a Contact Manually.
Enter the contact's email address.
Add the contact to your campaign.
You can repeat these steps to add more contacts.
Managing Contacts
Once contacts have been added, you can view them in the Contacts tab.
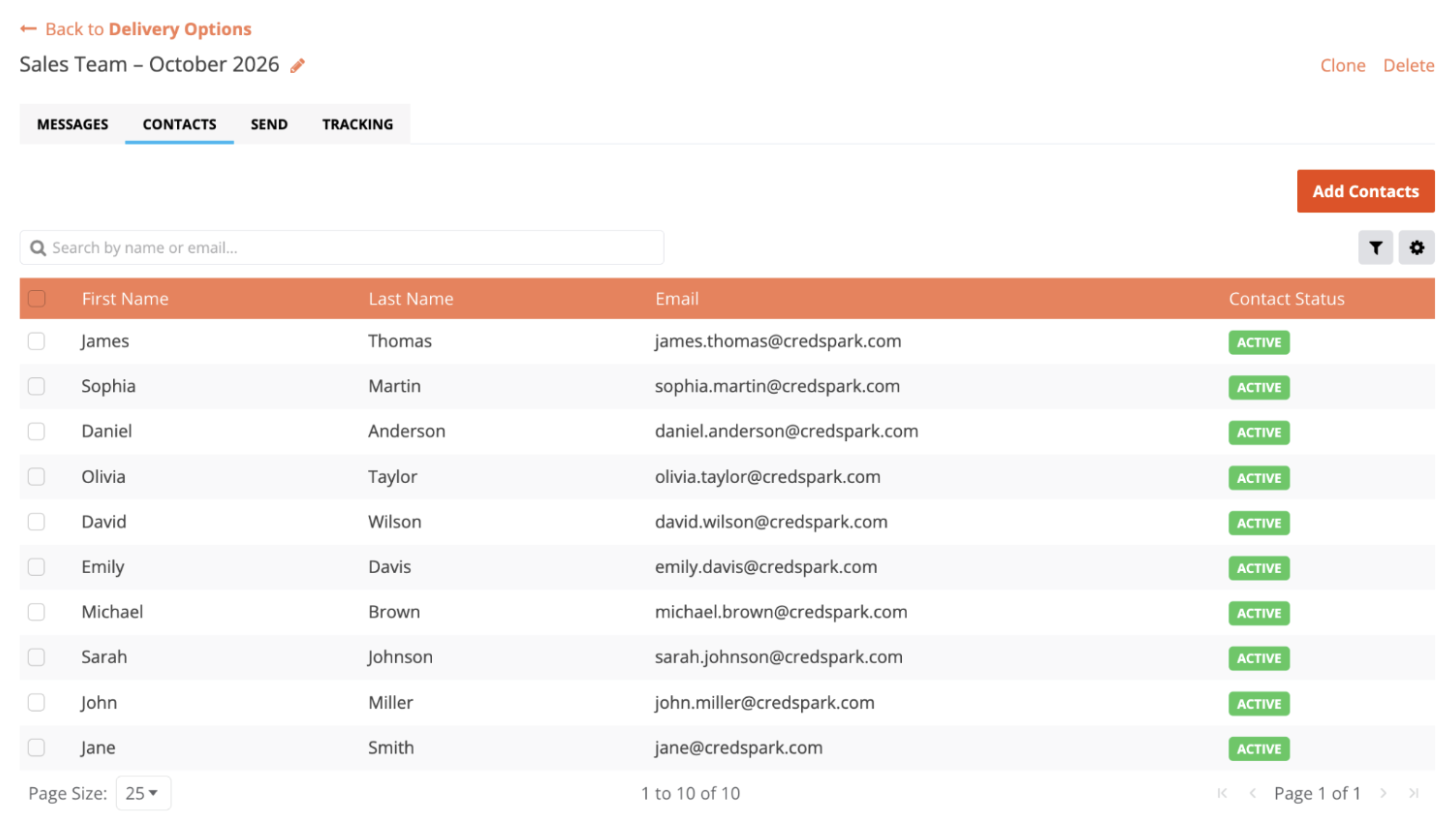
You can add more contacts or remove existing contacts from the campaign.
Contacts who have unsubscribed will not receive campaign emails.
You can also add more contacts after your campaign has already started. For example, if you have already sent invitations and realize that you forgot to include someone, you can simply add them to the campaign and send them an invitation.
If you have configured Reminder Emails, these will also apply to the new participants. Their reminder schedules will be calculated based on when their own Invitation Emails were sent, not when the campaign was originally started.
For more information about sending invitations to newly added contacts, see the Send section below.
3. Send
Once you have configured your messages and added contacts, you are ready to send your invitations.
Open the Send tab.
Review your campaign.
Click Send now to send Invitation Emails to your contacts.
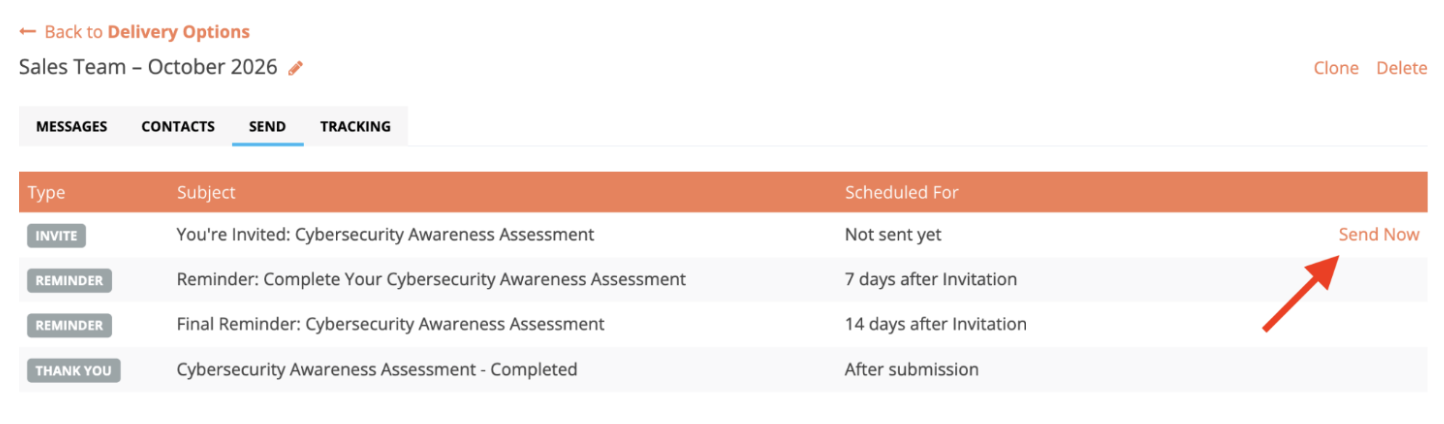
Invitation Emails are sent immediately. Scheduling invitation emails for a future date is not currently supported.
Sending to New Contacts
You can add new contacts to a campaign even after the initial invitations have been sent.
If there are no new contacts waiting for an invitation, the Send tab will display Sent.
When you add new contacts, the button will change to Send to X new, where X represents the number of new contacts waiting to receive an invitation.
Click this button to send invitations to those contacts.
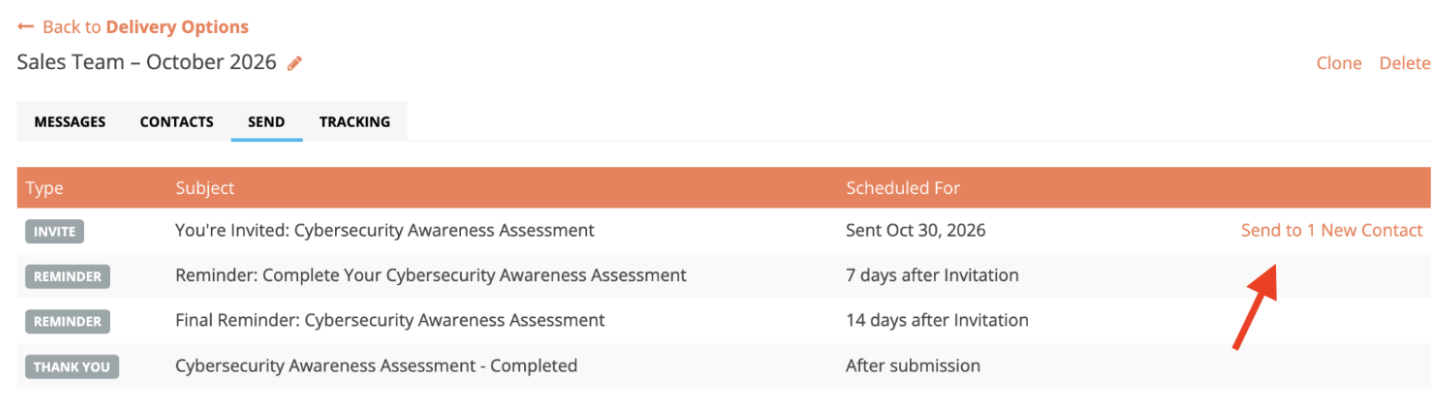
Participants who have already received an invitation will not receive another invitation through this action.
What happens to Reminder Emails for new contacts?
If your campaign has scheduled reminders, they will automatically apply to the newly invited participants based on their own Invitation Email Sent Date.
For example, you have configured a reminder to be sent 3 days after the Invitation Email.
You send the first invitations on Monday. Those participants are scheduled to receive their reminder on Thursday, provided they are still eligible.
You add another participant on Wednesday and send their invitation that day. Their reminder is scheduled for Saturday, 3 days after their invitation.
This means you do not need to create a separate campaign or reminder schedule each time you add new participants.
Confirmation Emails are sent automatically after participants submit their responses.
4. Tracking
The Tracking tab allows you to monitor your campaign's progress, including participant response statuses and email delivery activity.
Since each participant receives their own unique interaction link, CredSpark can track their individual progress and display it alongside their email activity.
You can access Tracking before and after sending invitations.
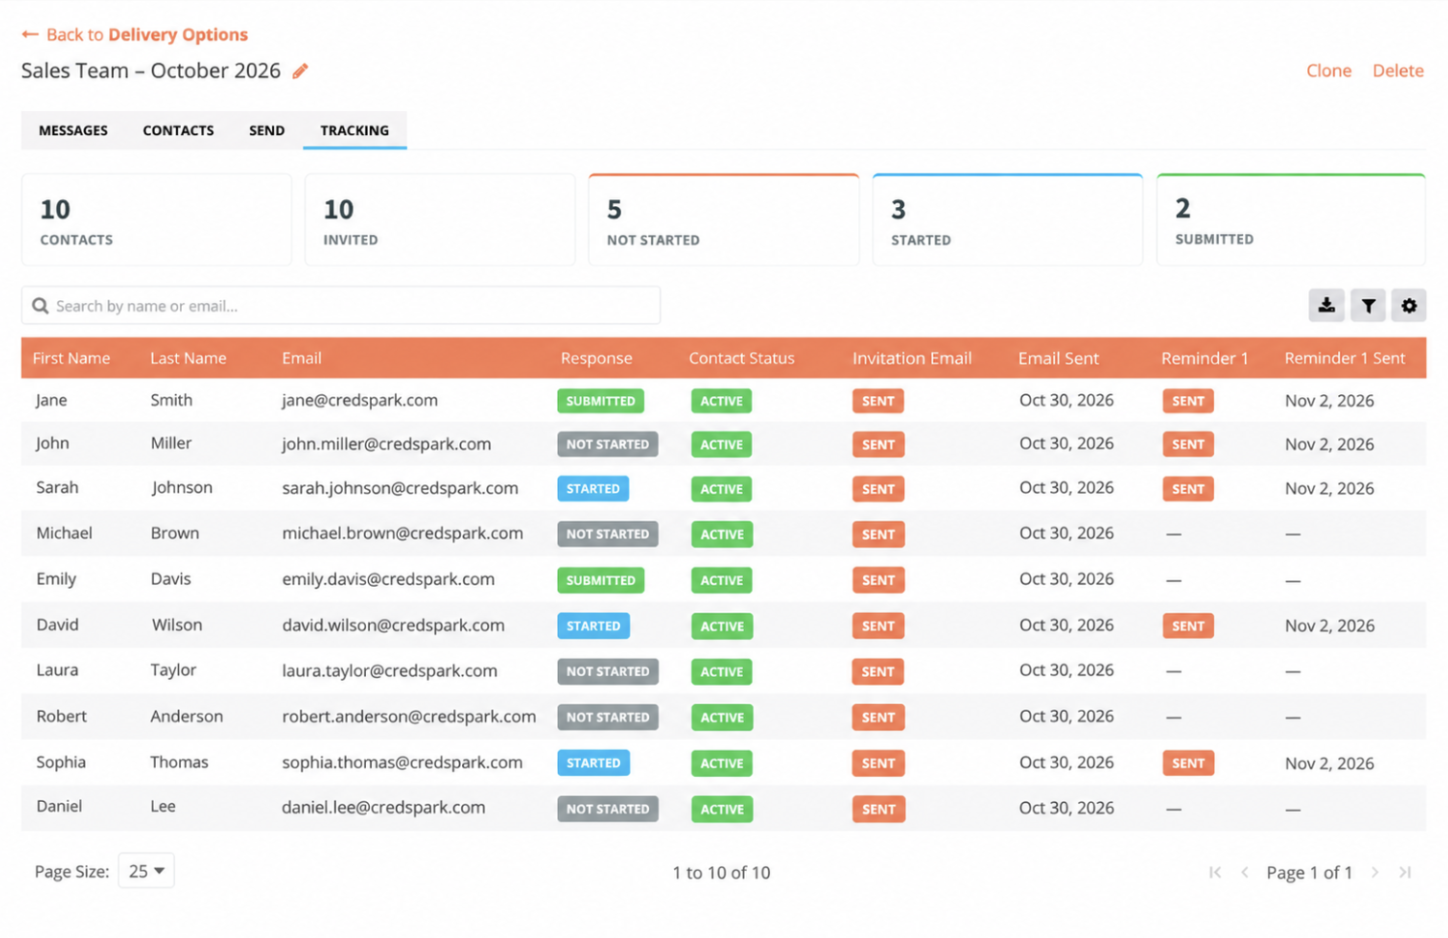
Campaign Overview
At the top of the Tracking tab, you will find the following metrics:
Tracking Individual Contacts
Below the overview, you can see the status of each contact.
Response Status
Each invited participant can have one of the following response statuses:
Not Started: The participant has not started the interaction.
Started: The participant has started but has not submitted their response.
Submitted: The participant has submitted their response.
If the participant has not yet received an invitation, the response status is will display blank field.
Email Status
You can also track the delivery status of individual emails, including Invitation, Reminder, and Confirmation Emails.
Possible statuses include:
Sent: The email has been sent.
Opened: The recipient opened the email.
Clicked: The recipient clicked a link in the email.
Bounced / Soft bounced: The email could not be delivered successfully.
Marked as spam: The recipient marked the email as spam.
Rejected: The email was rejected.
Error: An error occurred while sending the email.
Throttled: Email sending was temporarily limited.
For Invitation and Reminder Emails, you can also see when each email was sent to the participant.
If an email has not been sent or no status is available, the corresponding field may be empty.
Search, Filter, and Download
The Tracking tab includes tools to help you review your campaign activity.
Search: Find specific contacts.
Filters: Filter by response status, contact subscription status, or email delivery status.
Download CSV: Export the currently filtered tracking data.
Note: Tracking shows email activity and participant progress. To review actual answers, scores, and other interaction results, use the interaction's Data or Reports tab.
Managing Campaigns
You can create multiple campaigns for the same interaction.
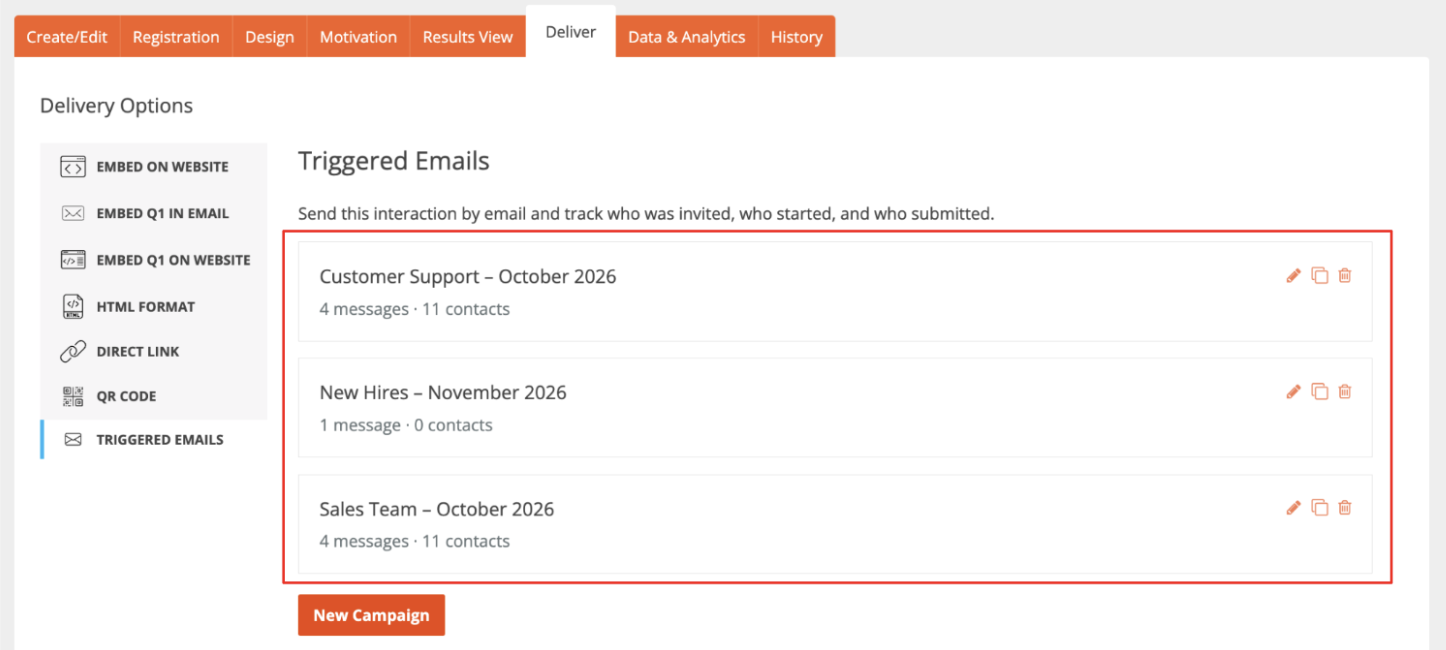
Each campaign has its own contacts, email messages, and tracking information.
From the Triggered Email page, you can:
Edit an existing campaign to manage its messages, contacts, and settings.
Clone a campaign to create a new one based on an existing campaign.
Delete a campaign you no longer need.
Important Note: Anonymous Responses
We strongly recommend not using Triggered Email with anonymous responses functionality at this time. Triggered Email is designed to track individual participants' progress, and it is not currently configured to support anonymous participation. Support for sending interactions by email without tracking individual responses is planned as a future improvement.